


Want to make the most of your music projects and build your own production library? Check out the Project Extraction Masterclass.
When you think of the perfect studio, you probably imagine something like this:

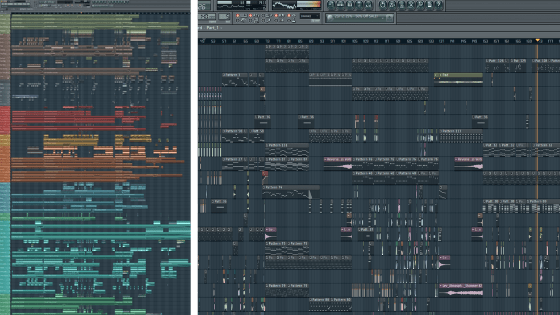
But having your samples and files unorganized makes your internal studio look like this:

When it comes to your music library, file and sample organization are paramount to good workflow, which will ultimately help you make better music.
Yet when most producers hear the word ‘organization’, they turn off.
“Producers are meant to be creative, not organized!”
The truth is, they go hand in hand.
Not sure what I mean? Stick around and let’s take a look.
Table of contents
A Primer on Pre-Production
Most of us know what production is. But what is pre-production?
Pre-production is everything you do before you sit down to write a new track (or work on an existing one).
Most of us have a limited time to make music. Therefore, it’s essential to make the most out of every opportunity we have to produce. To do this, we can optimize our pre-production to make our production sessions more effective and focused.
Most people neglect pre-production entirely, which is a mistake. I know I did in the early days.
Here’s what comprises pre-production:
- File Organization
- Time Management & Scheduling
- Planning & Productivity
- Mindset & Headspace
- Brainstorming (optional)
While we could talk about all of these stages, in this article, we’re going to be focusing on file organization, as it’s arguably the most undervalued.
Why Organize?
To put it bluntly, nobody has benefitted from specifically being unorganized.
You may have heard that messy spaces can make artists more creative. The truth is, it’s not the mess that’s helpful, but the access to your tools and materials that are actually helpful.
For one producer, that can look messy, yet for another, their studio might look spotless. Organized doesn’t necessarily mean ‘clean’, but it can.
Here are a few reasons to organize your files and have easy access to your tools.
Speed
Creativity benefits from speed.
You want to be able to quickly find/create the sounds you desire before an idea or series of ideas in your head fade away.
Example: you have an idea for a melody in your head. You’d like a basic drum beat as a backdrop so you can record it easier with your MIDI keyboard. If your samples are unorganized and you can’t find decent sounding drums quickly, the melody in your head might fade away as you focus on something else.
A similar example: if your presets aren’t well organized and/or you don’t know them well enough, you’re going to waste time looking for a decent sound for the melody in your head. This isn’t ideal.
Both these examples would benefit from using a “favorites” folder, which we’ll talk about in this article, but beyond that, having an organized file system for your samples/plugins/presets helps immensely with creativity and workflow.
The core idea here is this:
Is there something you can set up once, so that you don’t have do keep doing something else that is unnecessary?
The above was a great example – set up a favorites folder so you don’t have to spend 20 minutes finding a sample for every track. Here are some more:
- Rate your presets in your favourite synth, so you don’t have to find the good ones every time
- Chop up parts from a bunch of samples so you don’t have to manually find chops every time
- Set your DAW to auto-update so you don’t have to search for an update every time
Is This Really Necessary?
You might think that this type of file organization is pedantic and ineffective. After all, how long does it really take to find a plugin or preset?
But when you think about the production process, you realize that shaving seconds off processes that you repeat time and time again adds up immensely.
If it takes you 2 minutes instead of 4 to find a sample that fits during the production process, and you use an average of 15 samples per song, that’s 30 minutes that you’ve saved. No joke.
So, don’t be afraid to do upfront work that will shave seconds and minutes off production time. You generally only need to do this stuff once! Well worth the time investment.
Finding Your Sound
Wanna know a secret?
Finding your sound isn’t downloading a new preset bank, or a sample pack, or a new processing technique.
But it is the culmination of lots of them, refined over time.
Organizing your samples, deleting sounds you don’t like and saving your favourite sound effects racks are all going to help you in your sound curation journey. When you find your favourite sounds, you’re refining your taste, and inevitably, crafting your sound.
So if you needed another reason to get organized, think of how it will make you a more unique producer.
Nobody has the same exact library as you.
A personal example: my track Test was created in early 2018 once I had recently curated my favourite samples into Ableton Live 10’s ‘Collections’ feature. During the creation process, I was finding great sounds left, right and centre because I had already found them.
While it may be a coincidence, I think it was my best track at the time (although my sound has largely changed since then). It also happened to amass ~70k streams on Spotify, which was a lot for me at the time too.
The File Organization Process
Have I convinced you of the benefits yet? If so, then it’s pretty straightforward to start getting your library organized.
After years of personal experience, lots of research and just being in the world of electronic music production, we at EDMProd have come up with a simple yet solid process for getting your samples, presets and files ready to go.
1. Prerequisites & Recommendations
Before we even get into the main process, there are simply things that we would recommend you have in place to make this process and your life easier.
Use an SSD

If your main hard drive is not an SSD, you’re putting yourself at a disadvantage, not just because it’s a slower process for organizing your files, but also because it will slow down your music production experience.
You might thinking having more RAM and a fast CPU is enough, but your hard drive is where most of your files are stored, so don’t neglect it.
Don’t think you need one? You don’t, but it certainly helps a lot. The numbers speak for themselves.
Have Enough Space
No point in having a good hard drive if it’s always full to the brim.
Make sure that you’re leaving enough space for new samples, and to move samples around. Otherwise, this process will be very painful.
I recommend leaving a buffer of around ~50GB for moving files around.
If you need to, temporarily move your key files to an external hard drive and wipe/reformat your hard drive – sometimes it helps to start from square one.
Less Is More
Expanding upon the previous point, a great way to ensure maximum space is to clean up your computer’s hard drive.
Unused samples, plugins, sounds, projects and applications should be removed so you can keep your options to a minimum and space to a maximum.
Backup System
If you haven’t heard it before, you need to backup your samples, projects and resources – preferably in 3 places.
Why? Because nothing goes wrong until it does, and nothing’s worse than having to re-do something as big as organizing your file system.
Whether it’s an external hard drive, cloud storage or a personal server – get something (or all 3). Personally, I used an external hard drive and storage on Google Drive.
2. Plan It Out
Now you’re ready to plan out your file system. I’d recommend doing this step on pen and paper, as it helps to visualize what you’re trying to achieve.
Brainstorm

What do you want your production setup to look like? Where are your plugins? How many do you have? What sounds are where? How do they work in your DAW?
The purpose of this stage isn’t to develop a comprehensive system, but to get ideas out of yours.
There are no rules, but here are a few things to consider to get you started:
- Plugin formats
- Plugin library sizes (e.g. Omnisphere)
- Types of samples
- Approx. number of packs
- Integrating files and folders into your DAW
- Project version control
Sketch

On a separate piece of paper, start to refine your brainstorm down into a practical system that will work for you. This will likely look like an overall folder structure, as in my example pictured above.
You’ll have to be a bit more methodical here, so maybe you’ll want to draw out the files and folders you’re planning on having, and how they link into your DAW. A few pointers:
- Minimise the number of subfolders you have – less is more
- Be comprehensive – have a place for everything and leave nothing in the dark
- Make it easy to upkeep – don’t overcomplicate it, as you’ll want to be able to keep things organised when you inevitably download new plugins, samples and presets
- Do many different versions – the first system isn’t necessarily the best, and you may find yourself refining things as you go
Looking for a dedicated sample manager plugin? Check out our list here 🔥
3. Curate Quality

Now that you’ve got a solid plan for your file system, you’ll want to take a look at the files and resources that will comprise it before you start filling it up. Yes, I’m talking about those random packs you downloaded off Reddit 3 years ago, and your old cracked Vengeance samples.
Recommended: Our Ultimate List of Free Sample Packs and Resources
If you’re reading this, there’s a great chance that you’ve already got a large number of projects, samples and plugins on your hard drive.
The truth is that you can’t possibly like, or even need a large majority of sounds. So my recommendation is to remove unused resources and narrow it down to your favourites. It’s much easier to organize once you’ve narrowed down your options.
This process isn’t necessarily easy, so you may have to go and revisit it many times down the track as your sound refines and changes over time.
4. Adopt an Organization System & Method

There are many modern solutions to organizing your samples, but our recommendation is just to set up a folder system for organizing your samples. It integrates into your DAW easily and can be endlessly customised.
Organizing your samples can look like different things for different producers. But one thing I would recommend considering it Steve Jobs’ ‘3 Touch Rule’, which basically means it takes no more than 3 clicks/presses to get to what you’re looking for.
You shouldn’t have 6 subfolders to sift through just to get to your favourite bass synth preset.
Samples

Samples are the notoriously most difficult music production resource to organize, as they are very accessible thus most producers have so many of them.
Most producers have a conglomeration of random sample packs or sounds in a random folder, or in multiple random folders, or even on their desktop.
This is no way to work. There are a few different ways, depending on your preferences, to get these looking clean and accessible.
- By company/pack name:
- Least upfront work (Splice will do this for you automatically)
- Good choice if you know what each sample pack is good for.
- For instance, I know that the Gill Chang Eventuality pack has some great snare/slap sounds. I know that the Dave Winnel pack has kick drums that I like.
- This works best if you listen to what’s in the sample packs you download. I recommend making the habit of spending 5-10 minutes browsing through new sample (and preset packs) that you download.
- One drawback to this is that if you have A LOT of sample packs, you tend to revert back to the ones you always use (because you’re familiar with the names) and avoid ones you rarely use. This can somewhat limit your creativity.
- In this case, set some time aside to explore your unused packs. It will help shake up your workflow in future sessions.
- By type
- This requires a lot of upfront and ongoing work, but it can be a great system.
- It’s not ideal if you make many different genres of music, or have a diverse range of sample packs. It’s hard to find appropriate samples unless you use a more granular filing system:
- For instance, if you place all the snares/claps from a trance sample pack into the same folder as all the snares from a dubstep sample pack, that folder isn’t going to have a consistent set of sounds. One workaround is to create two folders, one call “trance snares/claps” and one called “Dubstep snares.”
- By genre
- Useful if you produce commercially and aren’t too concerned with originality. I.e., a client comes to you and asks you to make a commercial house song, so you pull all your samples from a folder titled “commercial house” which contains a few sample packs.
- Drawback: there’s a lot of crossover between genres, so it may not be useful. For instance, the samples used in dubstep and drumstep are quite similar.
Other Options
Although they don’t 100% fit into our process, it’s worth mentioning that there are a few external solutions for organizing your samples in creative and useful ways.
- ADSR Sample Manager – Our personal favourite third-party sample manager. Super clean interface, straightforward to use, and FREE!
- XO – part beatmaker, part sample search plugin
- Sononym – smart categorisation of samples, with folder export-ability (would work well with our suggested system)
- Atlas – similar to XO
Check them out if you want some more automatic solutions.
Presets
Second to samples are presets. If there’s another resource producers have stockpiled far too many of, it’s presets.
Here are a few organization considerations:
- Simple but often ignored: Keep presets and preset packs in your plugin’s native folder. Your plugin’s manual will tell you where this is.
- If there’s no native folder, create a general presets folder that is easily accessible.
- You can split presets by type (bass, lead, FX, etc.) but this is time-consuming. Some producers use this method, so try it if you think you’d benefit from it.
- Folder – You can create a folder for each preset type – this is more clicks but looks cleaner (e.g. Bass, Leads, FX etc.)
- Naming – If you prefer less clicks, you can put a preset prefix at the start of the filename. Normally, these are shortened abbreviations of the full name (e.g. BS – Fat & Crunchy)
Recommended: Serum Presets: The Best Free/Paid Packs in Each Genre
Plugins
Although it’s harder to have an abhorrent number of plugins, some producers manage to surprise me.
Before you even start organizing them, curb your collection. This is often harder, especially for producers who have sunk money into many different VSTs and synths.
As tough as it is, your workflow will thank you if you’re ruthless with your options. Fewer tools equal greater focus.
Once you’ve narrowed your collections to your current set of plugins, here are some methods of organizing them.
- By company (recommended)
- Normally automatic, especially if you’re on Mac.
- Unless you download hundreds of plugins a day (which is a bad idea), you should know what it is you’re downloading, why you’re downloading it, and the company that makes it.
- I use this method personally.
- By type
- This can speed up workflow, especially if you have a wide array of plugins. The drawback to organizing plugins by type is the amount of upfront work involved.
Projects
If you’re like most people, you use one folder for ALL of your project files.
In this one folder, you have some projects that are completely blank. You’ve started them with great intentions, but nothing came to you.
You also have projects that are in the idea stage. You’ve got a simple melody or vocal down, but nothing more.
Then, you have projects that are almost finished. They’re about 90% of the way there.
You also have projects that are finished.
Now, let’s say you wake up tomorrow morning and you don’t have any obligations. No study, no work.
You’ve got 3 hours ahead of you, and you’re going to spend it making music. You don’t want to start a project from scratch, but rather work on something that’s already in progress.
How long is it going to take you to find such a project? If all your project files are in one folder, and they’re all at different stages, you’re basically taking a stab in the dark. Unless you have a photographic memory, you aren’t going to know which projects are well underway (around, say, 50%).
It’s not wise to place all your project files in just one folder. It makes it hard to find specific projects that are close to, or far away from completion. It makes it hard to find what you want to work on.
There’s a better way. It’s called the 5-folder method. You don’t have to use 5 folders, and you don’t have to follow the same naming conventions as I do. The main point of this video is to show you the importance of having some sort of system for organizing project files.
The 5-folder method is simple and straightforward.
Folder 1: Practice

The first folder is Practice.
This is where all your learning or experimentation-related project files will go. Let’s say you’re reading a book on music theory and it has practical exercises at the end of each chapter. You want to save the work you’ve done for those practical exercises in case you need to reference them later on, so you save it in the Practice folder.
The Practice folder is also where you’d place any muck around/experimentation/sound design sessions. Maybe you’re playing around with a new synth, or a new sample pack.
Note: if you come up with a musical idea you really like during one of these experimentation/sound design sessions—move the project file to folder 2: Ideas.
Folder 2: Ideas

The second folder is the Ideas folder. This is where you’ll place your ideas, which could be anything from a simple melodic or rhythmic motif to a fully-fledged 8-bar loop.
Folder 3: In progress

There’s not a clear line between folder two and folder three. For you, it might be better to merge them into one folder.
To me, the in-progress folder contains ideas that have been further developed and are worth pursuing. The idea has been arranged, and it’s started to transform into a song rather than just a loop.
While the in-progress folder contains projects that are past the idea stage, there’s still usually a lot of work to do on these projects, which is why folder 4 exists.
Folder 4: 90 percent
The fourth folder is what I call the 90 percent folder.
It contains project files that are well on their way to completion. They’re almost finished, there are just several tweaks that need to be made, or there’s something missing.
This is the folder you’ll want to come back to time and time again when you feel creative and have high energy. As we all know, the last 10% of a track is usually the hardest, so it’s good to have a bunch of 90% finished projects laying around when you feel like torturing yourself.
Folder 5: Finished

The fifth folder contains all your finished projects.
I don’t think this needs explaining.
Bonus Tip 1: You may find it useful to create a “bounce” folder within each folder. It can be easy to forget what certain projects sound like, and for those of us with slow computers, it may take several minutes to open up a project, only to find it’s not the project you’re looking for. When you’re done working on a project, even if it’s not finished and you don’t think you’ll come back to it, bounce the track into a “bounce” folder. That way, next time you are looking for a project to work on, rather than waste 5 minutes opening up the project, you can simply play the bounce of the session to hear if it’s what you were looking for.
Bonus Tip 2: Save a new version whenever you have backwards compatibility issues, and put them all in the same folder (Ableton Live does this automatically). That way you don’t risk projects becoming corrupt or having issues.
Other
While we don’t have specific guides on organizing these resources, you’ll want to give some through to the following:
- MIDI files
- Impulse Responses (for Convolution Reverb)
- Reference tracks
- Music to sample
- Clips (Ableton Live only)
Recommended: How To Sample Music: The Complete Guide
5. Optional Extras
Favorites Folder
Really, this should be a non-optional, but it depends on how you have your system set up.
It’s worth creating a favorites folder for your samples and synth presets you use the most.
Why?
Because sometimes, you’re going to have an idea in your head that you want to quickly get down, and you don’t want to have to worry about finding sounds that work.
By having a favorites folder of sounds and presets that you know well and trust, you can forget about that process initially and get the idea down straight away. Later on, you can come back and spend more time on sample selection and sound design, refining the idea.
Creating a favorites folder doesn’t limit creativity: it breeds it. Having highly selective folder of samples you trust will allow you to focus on the creative process, rather than waste time and energy finding samples that work.
I recommend creating a Favorites sample pack of 25 samples (kicks, claps, etc.) and the same with presets. Make sure they contain all the samples/presets you generally need to create a fully-fledged loop (don’t worry about FX like crash cymbals, though).
You want this folder to be easily accessible. I recommend putting a hashtag in front of it so it sits at the top of your browser, or using something like Ableton Live’s Collections feature.

File Naming
The problem with some sample packs, preset packs and other production resources is that the naming doesn’t make sense, or doesn’t work in the context of your workflow.
The solution to this, although tedious, is to individually name files according to a system. This works well if you’re using the ‘By Type’ sample organization method, as you can group samples from different sample packs in the same place if they have the same function (e.g. a kick drum) and give each an appropriate name, rather than something along the lines of ‘Kick05’.
Another thing to consider when naming is whether or not you should add the key. This might not be for everyone, depending on the genre you make. Using a solution like Keyfinder or Mixed in Key can help with this, or you can use a tuner device and some good old-fashioned music theory + listening.
- Sample Naming
- Name creatively according to each sample type (e.g. Kick – Thump)
- Add key/musical information into file name for quick identification (e.g. C#m7_Old Keys Chop)
- Preset Naming
- Name creatively according to each preset type (e.g. LD – Squeaky Clean)
- Project Naming
- Use a working track/creative name (e.g. Smoke and Mirrors)
- Use a genre name (e.g. Tech House 002)
- Use a descriptive name (e.g. Fast Techno with Computer Sounds)
- Plugin Naming
- Usually automatic
Personal Library

Your library consists of presets you’ve designed or modified, samples you’ve recorded or made, musical ideas/MIDI files you’ve created, and anything else you can think of.
It’s your second brain. Think of it as a notebook of sounds. It’s something you can fall back on, reference, pull inspiration from. Most importantly, it’s something you can leverage.
So, why is it important to build your library? Why not just use resources that other people have made? After all, the most important thing you can be doing is producing music, right?
There are three reasons why you should build your library:
#1: Less excess
There are projects you’ll never finish. You may have done a lot of work on these projects, and you don’t want to let that work go to waste.
By committing to building your personal library, you can salvage the ideas, sounds, and presets from unfinished songs that will never see the light of day.
#2: Unique output increases
You build a library of sounds and ideas that are YOURS and you can draw from whenever you need. Your library serves as a source of constant inspiration and assistance. You’ll get stuck less, you’ll use more of your own stuff, and as a result, the quantity of unique music you produce will increase.
#3: Monetization
It takes a long time to build your own library, but after a few years, it may be at the point where you can (if you choose to) package it and sell it as a sample pack.
This isn’t for everyone. If you do this, you are giving your secret sauce away. But if you’re not concerned about that, then it’s a good way to supplement your income.
Initially:
Go through finished and unfinished projects and pull out anything you like that you’ve made, modified or recorded. Organize it into a folder system.
This will take hours, if not days, but it will be worth it. A short bout of mundane, upfront work for a permanent increase in productivity and creativity.
Ongoing:
After the strenuous task of going through your projects and pulling everything you like (that’s yours), you want to develop the habit of saving everything good that you make.
Design a preset? Save it.

Record a sample? Save it.
Come up with a great idea that doesn’t fit the project you’re currently working on? Save it.
If your DAW allows you to save instrument and effect chains (such as Ableton’s Audio Effect Racks and Logic’s Channel Strips), constantly save your processing chains.
When you finish a song, go through the project and save everything you made that you like. There’s no shame in re-using sounds in other projects.
Focused Prep Sessions
You want to set aside time, ideally every week, for non-writing sessions.
Production sessions where you create stuff that can be used during your writing sessions.
This idea isn’t new. Ill Gates talked about it in his Ill Methodology workshop where he recommended that producers separate their sound design and writing sessions.
During these sessions, think about building your library. Think about how the work you do during these sessions will have an impact on your writing sessions. How it will help streamline your workflow and save you time.
Focused prep sessions normally consist of sound design, but you could also consider doing things like:
- Random experimentation
- Loop creation (drum programming)
- Rapid idea generation
Take advantage of opportunities
Going on a helicopter trip? Take a handheld recorder.
Have a smartphone? Anything can be a sample source: be aware and open to the sounds around you. Don’t worry about the quality of the recording; oftentimes lo-fi recordings are desirable.
Start recording your life and interesting stuff that happens in it.
Help, I’m Still Stuck!
So you’ve tried organizing your samples, you’ve tried watching YouTube videos, you’ve tried a bunch of plugins, and you still can’t make good music?
The reality is that these things won’t help in isolation – you need a framework for learning. Something that teaches you the fundamentals.
That’s why we created our FREE video training, which you can get access to below.
Any questions? Email me at [email protected].
